Quality IT, Advice, Support and Delivery

Tuesday, 17 March 2015

Step by step guide to set up email on your iPhone

Email set up is often the first step in setting up a new phone; however it is also one of the most common problems on our helpdesk. So here is a step by step guide to setting up your work email on an iPhone...

Firstly launch the settings app by selecting the settings icon on your home screen. (It usually looks something like the image below)

After selecting the settings icon, you need to select Mail, Contacts, Calendars from the list. Then you will need to select Add Account followed by Microsoft Exchange.


On the next screen you will need to enter the following information:
  1. Email – enter your entire email address, using all lowercase letters
  2. Domain – leave this field empty
  3. Username – enter your entire email address again
  4. Password – enter the password for your email account
  5. Description – enter a descriptive name for your account (eg. Work)

Once complete tap the next button and your device will attempt to verify your account.


If you receive an “Unable to Verify Certificate” message tap the accept button, the device will then continue verifying the account. Once complete tap the Server field, and enter in connect.emailsrvr.com


Tap the next button and the device will then try to create a secure (SSL) connection to your Exchange server. When connected, you will see check marks along your settings to confirm that the account has been verified.


Finally tap the ON/OFF buttons to select which information to synchronize with the Exchange server and then tap Save to finish.

For more step by step guides like this follow us on LinkedIn 

Thursday, 5 March 2015

Windows Server 2003 End of Life - Be Prepared!

Last year we saw Microsoft retire both Windows XP and Office 2003 and this year will see Microsoft retire yet another product. Windows Server 2003 is the latest Microsoft product nearing its end of life date of July 14, 2015.

What does End of Life mean for end users?
Every product we use is likely to have a lifecycle, and Microsoft products are no different. All that Microsoft mean by the end of life of any of their products, Windows Server 2003 included, is that Microsoft will no longer support the product. Ultimately this means that Microsoft will no longer provide automatic fixes, updates or online technical support for retired products. 

After July 14, 2015 Windows Server 2003 will no longer receive assisted technical support from Microsoft, software and content updates or the security patches that help provide protection from harmful viruses, spyware and other malicious software, thus resulting  in an unsecured and unstable infrastructure for your business. Not migrating away from Windows Server 2003 will expose you to an elevated risk of cybersecurity dangers or malicious attacks.  
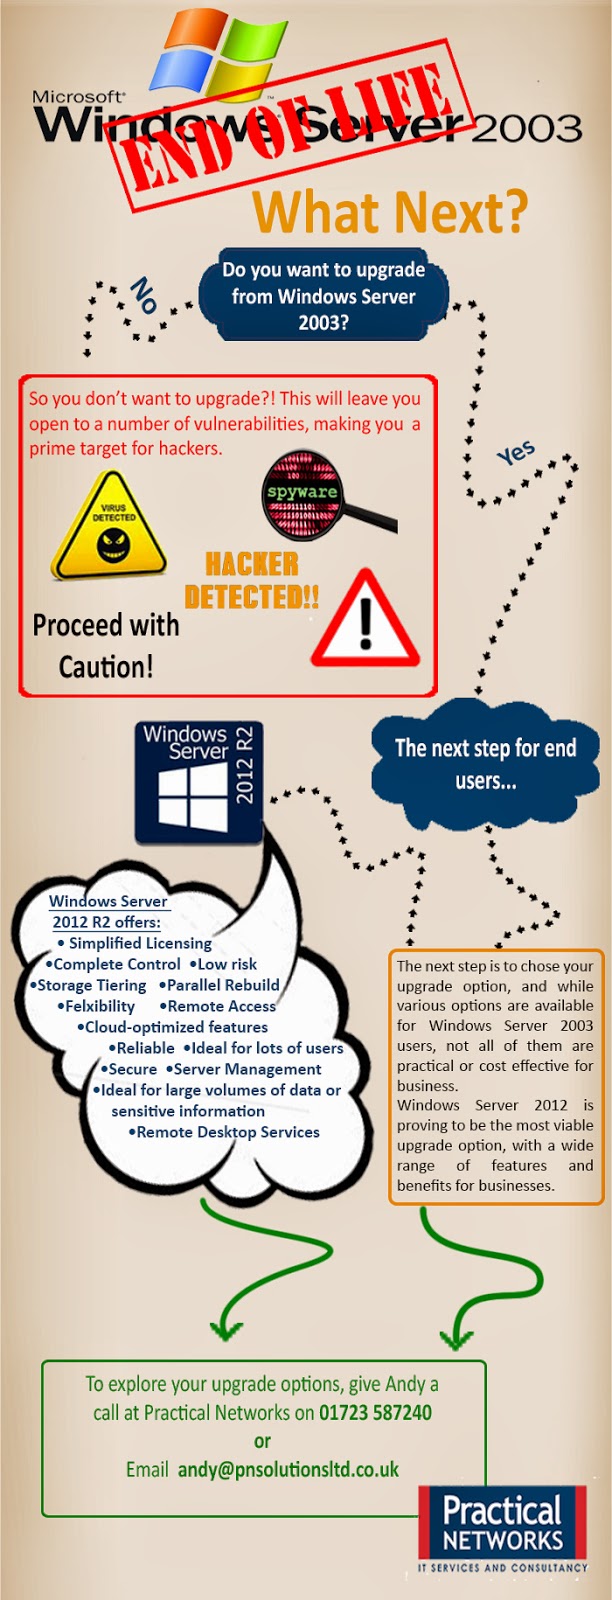

Continuing to use an unsupported server operating system would not only leave you vulnerable to hackers and security attacks, but it could end up costing your business a small fortune in maintenance costs. After July 14, 2015 you will need intrusion detection systems, advanced firewalls and network segmentation  to protect the vulnerable Windows Server 2003 platform, and the cost for maintaining ageing hardware will continue increasing with time. Also you may find that using an unsupported server operating system will result in a failure to meet industry wide compliance standards, which could ultimately result in a loss of business.

Another reason to migrate away from Windows Server 2003 before the end of life date is the fact that new software and hardware devices will no longer be built to integrate with Windows Server 2003, thus resulting in compatibility issues when updating software or hardware.

Act Now – Discover your upgrade options
As we explored above it is highly unadvisable to continue using Windows Server 2003 after it reaches its end of life, and so the only remaining option is to upgrade.  It is important to start your upgrade early as it will take a lot of planning and executing, and leaving it until the last minute is a big risk to take.

Here are the four key steps for migrating away from Windows Server 2003 as; discover, access, target and migrate.  


 Step 1 – Discover:
It is highly recommended that you start by finding out and cataloging the applications and workloads you have running on Windows Server 2003. It is vital that you catolog everything that you have running on Windows Server 2003, as this will help insure that nothing is omitted from the migration.

Whether you use the Microsoft self-service toolkit or collaborate with a Microsoft Partner this process is a lengthy yet essential part of the migration planning.

Step 2 – Assess:
Once you have a complete catalog of applications and workloads, it is time to assess its contents. This means categorising and analysing your applications and workloads based on four key factors, type, importance, complexity and risk. This assessment will allow you to prioritise workloads and applications for migration, while also helping identify and issues.

Step 3 – Target:
In this step you need to determine a migration destination for each application and workload. The choice of destination will be driven by factors such as speed, ease of migration, cost and desired functionality, with the most common choice being Windows Server 2012 R2.

Step 4 – Migrate:
The final step is to execute the migration, however finding the right migration plan may require additional analysis and assistance. Such assistance is available from Practical Networks a trusted Microsoft Partner.

If you would like more information or any assistance with your migration, please do not hesitate to get in touch with either David Philps or Andy Potts on 01723 587240.

Thursday, 19 February 2015

BYOD enable your business with VMware Horizon View

In our current device centric environment, end users expect to be able to stay connected to their professional networks via mobile devices and that’s where this quarter’s software pick comes in. This quarter we have chosen to introduce you to VMware Horizon View, a software that provides an agile and adaptive approach to computing, enabling IT to balance business requirements with the needs of end users.

What is Horizon View?

Horizon View is complete solution for desktop and application virtualisation, brought to us by VMware.  Horizon View offers organisations the flexibility to meet the needs of a mobile and global workforce, all while maintain extremely high levels of security and control. This is done by placing all of your organisation’s desktops into one centralised managed service, keeping all your desktops in one place where you can easily manage and customise desktops to fit the needs of your end-users.

Transforming your desktops into virtual machines with Horizon View will simplify tasks such as troubleshooting and provisioning and will also dramatically reduce the cost of managing each user desktop.  In addition, as all of your data will be stored on virtual desktops your users will be able to access their personal settings and data from any device, in any location, making for better user experience and increased productivity.

Horizon View is made up of numerous components, such as:
  • VMware vSphere Desktop (including vShield Endpoint)
  • VMware vCenter Server Desktop
  •  Horizon View Manager
  •  VMware ThinApp
  •  Horizon View Persona Management
  •  Horizon View Composer
  •  Horizon View Client
This combination of components allows Horizon View to provide you with secure, compliant and easily manageable virtual desktops throughout your organisation.

The Benefits

Desktop virtualisation with Horizon View offers numerous benefits to organisations of all shapes and sizes. These benefits include:


Horizon View is the only end-to-end solution that simplifies IT management, increases security and increases control of end-user access while decreasing costs by centrally delivering desktop services from your cloud. For more information about VMware Horizon View you can download the datasheet here, alternatively contact Andy on 01723 587240.  

Thursday, 5 February 2015

How to set up Email on an Android Phone...

Email set-up is often the first step in setting up a new phone; however it is also one of the most common problems on our helpdesk. So here is a step by step guide to setting up your work email on an Android phone...

Firstly launch the email app by selecting the email icon on your home screen. (It usually looks something like the image below)

On the next screen you will be prompted to enter your full email address and password, once you have done so press next.

On the next screen you will be prompted to select the type of account, select the Exchange account option.


Next you will be prompted to enter your full email address in the Domain/Username field (in some cases a backslash may automatically be added to the beginning of your email address). Make sure that the Use Secure Connection (SSL) option is selected before pressing next.


Once you click next you device will start Checking Incoming Server Settings, then on the next screen select OK to allow it to remotely control some security features on your phone.


On the next screen you will see the Accounts Options; all you need to do is select all that apply to you. 


On the final screen you give the account a descriptive name of your choice and then select Done.


Got an Iphone? Keep a look out for our blog on how to set up email on an Iphone. It's coming soon!

Thursday, 22 January 2015

Server Virtualisation & how it could benefit you!

Server Virtualisation

What is Virtualisation?


Virtualisation is a proven software technology that is rapidly transforming the IT landscape and fundamentally changing the way that people compute. Virtualisation essentially lets one machine do the job of multiple machines, by sharing the resources of a single machine across multiple environments. Thus allowing for multiple virtual machines to run independently on the same physical machine, at the same time, with each virtual machine representing a complete system. Virtual servers and virtual desktops let you host multiple operating systems and multiple applications locally and in remote locations, freeing you from physical and geographical limitations.

What is Server Virtualisation?

Server Virtualisation is essentially the partitioning of a physical server into a number of smaller virtual servers, helping to maximize your resources. By enabling multiple ‘virtual servers’ to be run on a single or a reduced number of shared machines, server virtualisation dramatically reduces the number of physical servers required, in an organisation.


Why Virtualise your Servers?

Server Virtualisation offers numerous benefits for businesses, including; reducing costs, increasing efficiency, increasing server utilisation and centralising infrastructure management.


Server virtualisation has numerous features to offer organisations of all sizes, ultimately resulting in a range of benefits. While we have not covered all of the benefits here, as a VMware partner we have a vast amount of knowledge to share, so if you would like any more information please contact Andy Potts or David Philps on 01723 587240.

Thursday, 8 January 2015

How to Map a Network Drive!

Mapping a Network Drive

Mapping a folder on a network server is perfect to create a shared space, which anyone on the network can easily access. You can also map a drive to another computer within your network in order to increase storage space or create a collaboration space for you and your colleagues.

However before you start, you need to make sure that you have both share and security permissions on the folder you want to share.  To make sure that the folder you wish to map is set to shared, right-click the folder and select properties from the menu, then click the sharing tab. In this tab select the advanced sharing option, this will open a new window. In this new window make sure that the tick box labelled Share this folder is selected before pressing apply.


Now here’s how to map a drive in Windows Vista, 7 and 8:

  •  Firstly, from the start menu select computer, or in Windows 8 type “computer” into the start menu search box and select computer from the search results.


  • Then click the map network drive button, located on the right hand side of the horizontal menu bar, which runs along the top, opening a new window.
  •  In this new window you need to select a drive letter, this is the letter that will appear on the network, to identify the drive.
  
  • Letters that are already taken may be identified, however if you do pick a duplicate letter, you will be prompted that this will overwrite the existing drive and given the chance to go back and change the letter.
  • In the same window as above, you also need to choose which folder you want to connect to. This can be done by manually typing the location into the field or you can browse and navigate to the folder that way.

  • Finally, to complete the process click finish.


Thursday, 18 December 2014

3-2-1 Protect your Data!

 The 3-2-1 Backup Rule from Practical Networks


Data-loss is a major disaster for businesses of all shapes and size, with 43% of businesses that are faced with data-loss not surviving the hit.  Of the businesses that do backup their data, 34% never test their backups and of those who do, 77% find that their backups are ineffective!!  Data loss has numerous causes with the biggest cause being hardware failure, and with 10% of laptops and 6% of PC’s encountering data loss every year, is your business prepared? 

Data Loss - The causes:


It is important for businesses to have a backup strategy in place and the Practical Networks 3-2-1 rule is a perfect starting point. 

The 3-2-1 Backup Rule: 

3. You should have at least three copies of your data – your primary data and two backups, all stored in different places.
2. Your copies should be stored on two different types of media – ‘Media’ means hard disks, CDs, tapes, DVDs, online backup, etc. Using two or more different types of media will protect against different types of technology failures.
1. You should keep one backup copy offsite – The idea is to keep one copy away from the location of the primary backups, thus reducing the risk of losing all backups. In this case Cloud backup can be a good choice.

For more information about how to backup your data effectively call Andy on 01723 587240.